Table of Contents:[hide]
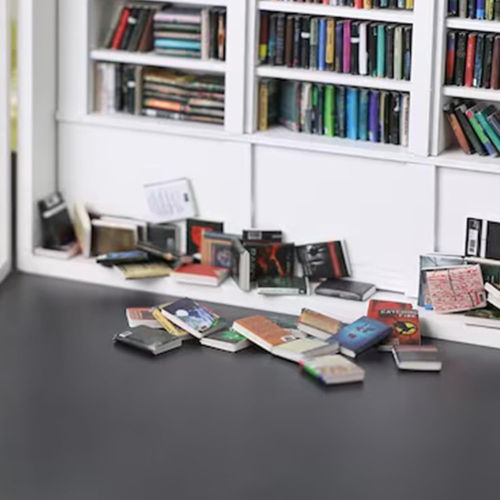
Let's have some fun with a custom painted Anxiety Bookshelf. This is an easy, and fun DIY project for any skill level. In this blog, were going to take a step by step trip along a cool customization. Let's take our Original Anxiety Bookshelf from Sydney's Collection, dump out the books, and paint it by hand!
The Anxiety Bookshelf by SydneySmith
Supplies:
- Anxiety Bookshelf<- Get it here.
- Small Phillips Screwdriver
- Standard Painters Tape
- 1-1/2 inch Paintbrush
- Small Paintbrush (for finishing)
- Egg carton
- Paint-I am using some leftover house paint for doors and trim. I recommend using this specific type of paint because it is durable, and can withstand this little bookshelves intended use.
- Fine-Grit Sandpaper
Prepare Your Paint
I am using leftover house paint from a home repair project. Paint for doors and trim is ideal for durability. Did you know that the trim in your home closest to the floor is known as ‘shoe mould’? The reason is that it is a primary point of contact for, you guessed it, shoes. So the paint needed is durable!

Recycled House Paint
We reuse and recycle as much as possible. If your paint is of questionable age, test it out on a surface to confirm that it dries effectively, and holds its pigment. If using the bookshelf as decor, there are more options available for paint as you will not be constantly grabbing and shaking your mini bookcase.

Prepare Your Bookshelf
Using fine-grit sandpaper, sand off any burrs, or loose wood pieces. Make sure your Anxiety Bookshelf is nice and clean using a damp cloth. Do not use a paper towel, the wood will grab and hold small pieces.
Remove Hardware
Use your small Phillips screwdriver to carefully unscrew all metal hardware from the bookshelf. There are twelve screws in total: Four holding the latch, and four holding each hinge. Place the hardware in a sandwich bag, and set aside for later.


Remove Display Window
The window is held in place using flexible metal prongs that can be gently bent back with a finger. If these small metal arms are too stiff, you can use a screwdriver, or pliers, but use care to not damage or scratch the clear display window.

Use Painter’s Tape: Take Your Time
This unit has a nice cherry hue to it, so I would like to keep the inner bookcase natural. For this, I have carefully placed painter’s tape along the edge and covered a large section that I would like to avoid. As you can see, I have left the middle uncovered. This will allow an area for my (clean) fingers to hold and adjust the bookshelf as I paint.

First Coat
Our first coat will be relatively light, so use your paint sparingly. The goal here is not to get the whole thing done in one shot but to provide a nice base layer. We will take our time to achieve the best result. Dip your paintbrush into the paint, and drag the brush along the edge of your paint can/tub to remove excess paint. Using controlled brush strokes, paint the entire outer case, as well as the front-facing frame. Once complete, place face down onto a halved egg carton, elevating the painted framework from your surface.

Follow your paint’s unique instructions for drying time. Once the coat is dry, flip the bookshelf onto its back, and paint the inner framework. As you can see, my painting surface is well, ‘used’, so I place a sheet of wax paper down to keep things clean. Let dry…First coat, complete!

Let dry for twenty-thirty minutes, then carefully remove the painter’s tape. You will add a fresh layer of painter’s tape once this coat is dry. It is important to allow your paint to dry slightly before pulling the tape, or you risk paint bleeding onto the surface. Conversely, if you let your paint dry completely, it will adhere to the tape and will come off unevenly.
Note: Since we’re already having some fun, I will be leaving my painter’s tape on until later. I will be conducting a little test to see the effectiveness of a butane torch in loosening dried paint, and will add asterisks (**) to reference this test.
Second Coat
Begin by placing a new layer of painter’s tape over the areas you wish to remain unpainted. For our second coat, we will repeat the same painting process, but this time, we will apply a slightly thicker layer and will use our paintbrush to carefully create a lined texture. Different textures can be achieved depending on the paint and paintbrush that you are using. If you are using the same ‘Door and Trim’ paint as I am, the texture is achievable. For a soft and smooth coat, I suggest using a foam brush instead of a bristled brush.

I have added a pretty cool reference to the bottom of the blog for those interested in a different paint texture. This list applies to various paint projects and provides insight into how to create texture using different brushes.

The second coat is complete! Follow the same instructions to remove your tape, and use your small paintbrush to touch up any unfinished areas that typically result in the tape’s edge. If you do not need touch-ups, well done!
Set your freshly painted and customized Anxiety Bookshelf aside and let it dry! I will let mine dry for about twenty-four hours before finishing.
**Removing the Tape**
I find myself in DIY project blogs quite often and came across an awesome tip that applies to acrylic paint that I was curious to attempt here. We can use a small handheld butane torch to quickly and gently heat along where the paint meets the painter’s tape. A chemical reaction takes place, softening the paint, and allowing the tape and paint to separate and pull away straight and easily. A success! Done correctly, this test method is avoidable, but it is a great tip for anyone who has left their painter’s tape on for too long.

Finishing
So you’ve followed along, and have a DIY-painted miniature bookshelf! Hopefully you followed my advice on the hinges and screws. They should be right there where you left them in the sandwich bag. Gently screw the hardware back into place, and use care to not overtighten.

Now grab those tiny books, and organize them into your bookshelf, or just stuff them in there! It’s your very own miniature library to do with what you please. I am proud of you for following along and completing your task, feels great doesn’t it!?

Tips:
-Use a small amount of paint on your brush to get the feel of how far your paint will take you. There is no need to lay on excess paint, which causes drips and build-up.
-Keep a sandwich bag handy for your hardware to keep it all in the same place, we do not need to hunt down our little screws later!
-Drink plenty of water daily for hydration. Not relevant, but important!
TEXTURE TIPS:
- Flat Brush: A flat brush can be used for broad strokes and smooth textures. Apply the paint evenly with the flat edge of the brush for a consistent texture.
- Round Brush: A round brush is versatile and can be used for both fine details and broader strokes. Use the tip of the brush for precise lines and the side for softer textures.
- Fan Brush: A fan brush can create soft, wispy textures. Use it to lightly feather the paint onto the canvas for a subtle, blended effect.
- Stencil Brush: Stencil brushes have stiff bristles and are ideal for stippling and dabbing paint onto the canvas. Use them with stencils or freehand for controlled texture.
- Sponge Brushes: Sponge brushes can create a variety of textures depending on how they are used. Dabbing or stippling with a sponge brush can create a rough, textured surface.
- Palette Knife: While not a brush, a palette knife can be used with house paint to create thick, textured strokes. Use the edge of the palette knife to scrape or spread the paint for a sculptural effect.
- Comb Brush: Comb brushes have serrated edges that can create interesting textures when dragged through wet paint. Experiment with different angles and pressures to achieve different effects.
- Texture Rollers: Texture rollers have raised patterns that can be rolled onto the canvas to create interesting textures. Roll the paint onto the canvas in a consistent motion for even texture.
- Bristle Brush: Bristle brushes have coarse bristles that can create rough textures when dragged across the canvas. Experiment with different pressures and directions to vary the texture.
- Foam Brushes: Foam brushes can create smooth, even textures when used with house paint. Use them for broad strokes or apply multiple layers for added depth.
Thank You!
I hope you enjoyed following along with this little tutorial. As always, feel free to comment, or send us a message at any time. If you would like to buy an Anxiety Bookshelf, head over to the gift shop, or click below! Make sure to tag us on social media with your awesome DIY Mini bookshelf projects!
Get your Anxiety Bookshelf here!