Table of Contents:[hide]

We have huge plans for our little gas fireplace, and I cannot wait to get going! Follow along as I clean it up while providing a guide for your very own step-by-step DIY mantel slipcover! This project can range in price depending on your selected wood species and tools needed. Follow along as we dive into a beautiful fireplace hack for beginners.
I'll include lots of images for your viewing pleasure. We will begin with our supply list, and finish with a fully custom, hand-cut, sanded, stained, and sealed rustic wood faux floating slab. Naturally, my wonderful wife will use her eye for interior design to finish it off.
Along with our custom mantle, I will be giving the entire facia a facelift. The old baby blue 4x4 tile? Gone. The accent mouldings and concave 'column'? Gone, and gone. I'll sand everything down, and will use white paint for doors and trim. So grab a coffee, and settle in, we have a lot of fun ahead of us. Here's what we're working with...
Supplies
- 1" x 8" x 8" Pine Board (x3)- Not linked, buy local!
- LePage Wood Glue
- My DeWalt Drill
- Wood Scews
- Minwax Early American Stain
- Varathane Diamond Wood Finish: Gloss
- Foam Brushes
- Cloth/Rag
- Circle Saw or Hand-Saw
-
220 Grit, and 100 Grit sandpaper
- 2x C-Clamps
Preparing Your Surface
I will simply anchor this cap to the existing mantle for easy removal later. To achieve a more ‘solid’ look, I will close off the base and cut out a notch to fit snugly around the existing face.
There was some tile that I removed before we began, this was easy using a small crowbar and hammer. I removed the remaining grout using a painter's knife's sharp edge, and some sandpaper.

After some measurement, I have decided to extend the mantle just a bit further than the existing top. I will stain the finished piece with 'Early American', and will finish with three coats of Varathane Diamond Wood Finish: Gloss. Before we begin, ill add a quick note and a thank you! We're having a lot of fun at Sydney's Collection, so check out my lifestyle blogs, and product blogs anytime!
Choosing the Right Wood for Your Mantel Slipcover
Selecting the right wood species is crucial for achieving the perfect DIY faux mantle beam look. The type of wood determines not just the aesthetic appeal but also the durability of your mantel cover over an existing mantel.
Best Wood Types for a Rustic Mantel
- Pine: Lightweight and easy to work with, pine is one of the most popular choices for DIY projects. It absorbs stain well, though its soft nature makes it more prone to dents and scratches—perfect for achieving a naturally weathered look.
- Oak: Known for its strength and durability, oak has a distinctive grain pattern that adds texture and depth. White oak, in particular, is highly resistant to moisture, making it a great option for long-term use near fireplaces.
- Cedar: Naturally aromatic, cedar repels insects and resists decay, making it an excellent choice for mantels in humid environments. Over time, cedar develops a unique silvery-gray patina when left untreated.
- Reclaimed Wood: Sourced from old barns, factories, and warehouses, reclaimed wood carries a rich history with its knots, nail holes, and imperfections. Each piece is one-of-a-kind, bringing authenticity and character to any DIY floating mantel slipcover.
Before staining, ensure proper sanding to enhance the grain and achieve a smooth finish. Depending on your chosen wood, stains like Minwax Early American can create a warm, rustic tone, complementing your fireplace perfectly.
Measure Twice
A simple design should be an easy process, but this is not an excuse to disregard the most basic rule. If you want perfection, you. must achieve it, even with a rustic looking piece. So ill measure every single piece twice, and mark with my trusty pencil before even considering my first cut.
When i'm ready, ill 'cut once', and will have five pieces for one awesome DIY faux mantle. Prior to fastening, ill pre-drill small holes to pilot my screws, this will help deter splitting.

The Bottom Cutout for Clearance
This is the difficult part, which really isn't that difficult. In order to create a nice fit for the base, I created a template using a piece of cardboard cut to the same size as our base piece. I measured the mantle, and created cuts in the cardboard accordingly.
Once complete, I simply placed my template over my wood piece, and traced it using my pencil. Even though I know my measurements were sound, there is no better feeling than that perfect fit!
 Hand- Distress and Rough It Up
This part was so much fun. The smooth, sanded, pretty pine boards were not doing the job aesthetically. With my wife's assistance, we made the boards rustic. To make your wood boards look rustic, you can simply beat it up!
We dragged it across the ground, hit it with a shovel, threw hammers and a measuring tape at it. Make sure that you don't get too carried away, we do want the boards to stay in one piece.


Assembly: Put it Together
Using wood glue, I align my pieces, and create the box. Once I have let the glue slightly dry, it is time to screw it all together. I sink my screws past the surface of the wood in order to 'hide' them just a bit.
You can see how I organized my pine box in the images, the important part is that the front facing piece is the 'cap', and does not show any seams.

Sand It Down
With my 100 grit sandpaper, I sand the entire box down. I use this opportunity to smooth the edges and slightly round them off. The goal here is to look as natural as possible, so perfect symmetry is not necessary for my application.
Vacuum, wipe with a nearly dry, damp cloth. Finish with a full hand sanding with 220 grit sandpaper. Once complete, make sure that you have vacuumed, wiped off, and cleaned your mantle completely. We do not want any leftover dust on our box, because the next step requires a clean surface.
It was a beautiful spring day, and the sun was out. I took the opportunity to get some vitamin D while working, and brought the table from the garage to the back yard. Here's where you get to see me showcasing the product! So here is a face that you can match to the name! It's me, Sydney!

Stain It Right
An important note here is that we do not shake our stain or wood finish, we simply stir thoroughly. In my well ventilated garage, I will take care of the stain and finishing. I dip my foam brush into the stain then wipe it along the grain in sections along the board.
Each time I paint on the stain, my other hand is ready with a clean, lint-free rag to spread it out. I make my way down the board and apply an even coat all around.
After two hours, I apply a second coat of stain for depth and to nail that dark and natural rustic look. I love this stain because it does not have that 'orange' look, but does bring some reds, and looks stunning on pine.

Finishing and Protecting the Wood
With a quality paint brush, I apply three coats of 'Varathane Diamond Wood Finish: Gloss'. Dry time between coats is two hours, and we sand with 220 grit sandpaper, and wipe the surface before our next coats. The first coat is slightly difficult, as I apply a light base layer, we need to be mindful of where we apply our finish, as it will look invisible with this light brushing.
Note that these mantels are slightly different from the Distressed Mantel Slipcovers, as we use a somewhat different construction. For example, we mix a construction grade fireproof clear coat with our polyurethane.
I will add a thicker second, and third coat. Sanding between coats is very important here, and please make sure to keep your work area clean and dust free. My garage may not be pretty, but I do everything I can to keep movement low while applying my gloss finish.

Mounting the Mantel
This will be an easy task, as I don't have the intention of mounting this into the wall. I will simply draw a line of wood glue along the existing mantle (after a light sanding), and sink three screws from the top down into it.
From here, we add a touch of stain, then poly to these small holes. The DIY fireplace mantel slipcover is now firmly in place, and is ready to bear a load. Without further ado, our finished product!


Optional: Install As Floating Shelf
- Step 1: Drill the wood bracket into your wall.
- Step 2: Place the fireplace mantel cover over the bracket.
- Step 3: Mount the mantel to the bracket using wood screws.
Tip: Selecting Screws for Mounting
When selecting screws for mounting, it's essential to ensure they are long enough to provide stability. A general rule is to choose screws that penetrate at least 1/2 to 3/4 of the way into the bracket for a secure hold. For example:
-
If your bracket is made from 2-inch wood, use 4-inch screws to secure it.
Pre-drilling small pilot holes helps prevent splitting and allows for smoother installation.
Clean it up
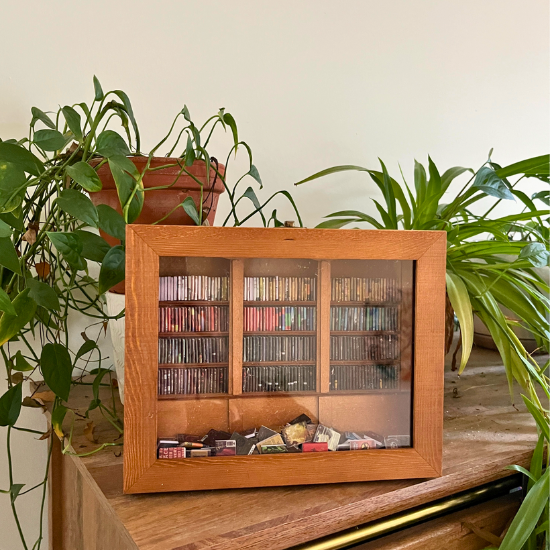
We're almost at the finish line, all we have to do now is grab the Windex, spray down a lint-free cloth, and clean it off one last time. We're excited to decorate this custom mantle cover with candles, pictures, and decor. Naturally, I'll be adding a tiny bookshelf at some point, because that's just what I do.
In Closing
There you have it, my handmade DIY floating mantle slipcover, I hope you enjoyed following along! Feel free to leave any questions, or highlight your experience in the comments section! This project was tons of fun and it garnered attention from the neighbours, so maybe it will not be my last time. Thanks for reading, come by anytime!
-Sydney
Showcase!


